
Key Takeaways
- Applying torque in three stages (30%, 60%, 100%) with a cross-pattern sequence ensures even gasket compression and joint integrity.
- Lubricating stud threads with anti-seize or moly paste reduces friction scatter and improves torque-to-preload accuracy.
- Routine maintenance must include visual inspection for corrosion and elongation, with nut replacement if threads are worn.
- Stud loosening and galling are often prevented by proper lubrication, correct torque sequence, and selecting compatible materials.
- Documenting torque values and inspection findings helps anticipate wear and schedule component replacements before failure.
A sudden hiss escapes from a pipeline flange—a clear sign that a stud fastener failed under pressure. Whether you’re assembling a new compressor head or retorquing bolts on a steam turbine, these simple threaded rods with nuts on both ends demand careful handling. This guide details how to install, use, and maintain stud fasteners to keep your equipment safe and operational.
What Stud Fasteners Do and Where They Sit in the Process
Stud fasteners are externally threaded rods without a traditional bolt head, designed to clamp parts when paired with two nuts. Unlike non-threaded fastening pins that primarily align components, stud fasteners provide the clamping force needed for pressure boundaries. Unlike bolts that bear directly on a head, studs distribute load symmetrically and are easily aligned in blind or tapped holes. You’ll find them securing engine cylinder heads, flanged pipe connections, structural steel, and heavy machinery where high-strength, vibration-proof joints are a must. Proper installation directly impacts safety and uptime, making this step-by-step knowledge essential for operators and technicians.
Before You Start: Setup, Safety, and Site Requirements
Preparation prevents most stud failures. Before you start, consult the engineering drawing or maintenance manual for the specified stud grade, thread size, and torque value. Gather a calibrated torque wrench, a wire brush, clean rags, and the correct thread lubricant (often a moly-based or nickel-based anti-seize for high temperatures). Ensure the work area is clean, dry, and well-lit. Wear cut-resistant gloves and safety glasses—threads can be sharp, and lubricants slippery. Check each stud and nut for wear—look for pitting, stretched threads, or signs of galling. If power tools are used for initial snug-up, set the clutch low and final-tighten manually. Never use an impact gun for final torque, as it can easily overstretch the fastener.
Step-by-Step Operation
- Choose the Correct Fastener: Match the stud material and grade to your application. For example, B7 alloy steel is common in high-temperature flanges, while 316 stainless offers superior corrosion resistance. Confirm the thread pitch—coarse threads are better for soft metals, fine threads for high-strength joints. Never substitute a lower-grade stud; always check the markings on the headless rod.
- Prepare the Threads: Clean both male and female threads with a wire brush and solvent to remove debris, rust, or leftover threadlocker. Inspect for galling or damage. Dry thoroughly before applying any lubricant.
- Apply Lubricant: If the manufacturer specifies, apply a thin, even coat of high-quality anti-seize or thread lubricant to the stud threads and the nut bearing surfaces. This reduces friction variation and ensures the torque you apply translates correctly into clamping force. Avoid over-lubricating, which can hydrolock the joint.
- Install the Stud: Thread the stud into the tapped hole by hand until it bottoms out, then back off a quarter turn if the design requires a slight clearance. For through-hole applications, insert the stud and start both nuts by hand. Use a stud installation tool or the double-nut technique to tighten the stud; avoid gripping the threads with pliers, which can cause stress risers.
- Assemble the Joint: Place the mating flange or component over the stud, then spin on the second nut until finger-tight. Follow a cross-torquing sequence in multiple passes to gradually compress the gasket evenly. For critical flanges, use a torque pattern recommended by the gasket manufacturer.
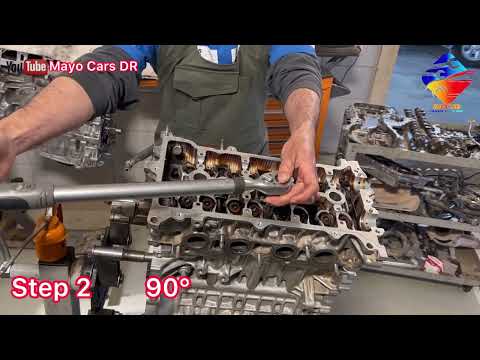
- Apply Final Torque: With a calibrated torque wrench, tighten each nut to the specified torque in the correct sequence. Work up in increments: first to 30% of final torque, then 60%, then 100%. This minimizes gasket blow-out and uneven loading. If the assembly gets hot after startup, allow it to cool before retorquing.
- Ongoing Maintenance and Inspection: Periodically inspect stud fasteners for signs of loosening, corrosion, or fatigue. Confirm torque values during planned shutdowns. Replace any stud that shows visible elongation, thread damage, or cracking. Document torque checks and replacements for critical assets. Remember that vibration and thermal cycling can relax tension over time; a scheduled retorque is often part of a reliability program.
Best-Practice Settings for Quality and Yield
Securing a leak-free, durable joint begins with selecting the correct installation parameters. While specific torque values depend on stud diameter, material grade, and lubrication, some universal practices ensure consistent results.
Always use a calibrated torque wrench. Refer to a Tightening Torque Reference — ISO 898 (reference) or the gasket manufacturer’s data for target torque values. Apply torque in at least three increments (e.g., 30%, 60%, 100%) following a cross-pattern sequence. This evenly compresses the gasket and avoids flange distortion.
Lubrication is critical. Apply a thin, even coat of anti-seize or molybdenum disulfide paste to the stud threads and nut faces. Lubrication reduces friction variance, allowing more accurate torque-to-preload conversion. Without it, dry threads can cause up to 40% fluctuation in achieved preload.
When assembling flanged joints, verify parallelism. Misalignment can cause uneven gasket loading and premature failure. Use feeler gauges to check gap uniformity around the flange before final tightening.
For critical high-temperature or high-pressure services, consider using tensioning tools such as hydraulic bolt tensioners to achieve precise stud elongation rather than torque alone.
Routine Maintenance Schedule and Common Wear Parts
Stud fastener assemblies in industrial service demand periodic attention to maintain integrity. Establish a maintenance schedule based on operating conditions: temperature cycles, vibration, and corrosive media influence inspection frequency.
During routine shutdowns, visually inspect each stud and nut. Look for corrosion pitting, thread galling, necking, or cracks. Check for loss of preload by attempting to rotate the nut with a hand wrench—any movement suggests relaxation.
Common wear parts include studs, nuts, and gaskets. Nuts, especially those with prevailing torque features, lose locking effectiveness after several reuses. Replace them if the locking element is worn. Standard Hex Nuts — ISO 4032 / ISO 4033 should be replaced if threads become rounded or deformed.
Studs themselves can stretch or suffer fatigue damage. Use a pitch gauge or micrometer to check for elongation beyond manufacturer limits. Any stud with visible necking or a diameter reduction of more than 1% should be replaced immediately.
Document all inspections and retorque values. A simple log helps track joint health and plan part replacements. Always retorque to specification after re-assembly, following the original tightening sequence.
Troubleshooting: 3–5 Common Problems and Likely Causes/Fixes
- Loosening: Vibration, inadequate preload, or thermal cycling can cause nuts to back off. Fix: Verify proper torque sequence and use locking devices such as jam nuts or threadlockers. Retorque after initial heat cycle.
- Thread Galling: Friction-induced material transfer causes threads to seize, especially with stainless steel studs. Fix: Always lubricate threads; use slower installation speeds; select studs with rolled threads and smooth finishes. If galling occurs, the stud and nut must be replaced.
- Flange Leakage: Uneven torque, incorrect gasket positioning, or scratched flange surfaces lead to leaks. Fix: Disassemble, inspect flange faces for damage, replace gasket, and retighten evenly per sequence.
- Stud Breakage: Over-torque, hydrogen embrittlement (in high-strength steels), or fatigue can cause sudden fracture. Fix: Use a torque wrench—never over-tighten with impact tools. Choose studs with appropriate material grade for the environment (e.g., B7 for high temperature, stainless for corrosion).
- Corrosion: Atmospheric or galvanic corrosion compromises stud integrity. Fix: Select studs made from materials compatible with the environment (e.g., 316 stainless for coastal settings). Apply protective coatings such as PTFE or zinc flake. Regular greasing of exposed threads helps as well.
| Aspect | Key Practice | Details |
|---|---|---|
| Pre-Installation | Inspect & Clean | Remove debris from threads; verify stud material and grade. |
| Lubrication | Apply Anti-Seize | Thin coat on threads and nut faces reduces friction scatter. |
| Torque Sequence | Staged Cross-Pattern | Tighten to 30%, 60%, 100% of final torque in a diagonal sequence. |
| Retorquing | After Thermal Cycle | Re-check torque after first heat-up and during scheduled outages. |
| Inspection | Visual & Dimensional | Look for corrosion, cracking, elongation; replace worn nuts. |
| Common Fixes | Even Torque & Proper Mat’l | Use correct lubrication; avoid over-tightening; select corrosion-resistant alloys. |
Frequently Asked Questions
What is the correct torque for stud fasteners?
Torque values depend on stud diameter, material grade, and lubrication. Always consult a tightening torque reference guide or gasket manufacturer's specifications. Use a calibrated torque wrench and tighten in at least three increments.
How often should stud bolts be retorqued?
Retorque after the initial thermal cycle (hot retorque), then periodically during planned shutdowns. High-vibration or high-temperature services may need more frequent checks to compensate for relaxation.
Can I reuse stud bolts?
Studs can be reused if they show no signs of thread damage, elongation, or corrosion. Measure diameter with a micrometer and replace any stud that has stretched beyond 1% of its original length.
What causes stud bolt loosening?
Vibration, thermal expansion and contraction, and inadequate preload are common causes. Proper torque sequence, lubrication, and the use of lock nuts or threadlockers help prevent loosening.
What lubrication should I use on stud threads?
Anti-seize compounds or molybdenum disulfide greases are typical. They reduce friction and ensure a consistent torque-tension relationship, especially important with stainless steel fasteners to avoid galling.