Key Takeaways
- Always tighten custom fasteners in incremental steps to ensure uniform load distribution.
- Use calibrated torque wrenches and refer to manufacturer torque tables or general standards like ISO 898 for proper preload.
- For vibration-prone joints, consider prevailing torque lock nuts or spring lock washers to maintain clamp force.
- Inspect fasteners periodically for corrosion, loosening, or fatigue, and replace any that show signs of permanent deformation.
- Thread galling in stainless fasteners can be minimized by using anti-seize compounds and slow tightening speeds.
What Custom Fasteners Do and Where They Fit in Your Assembly
Custom fasteners are not off-the-shelf components. They are tailor-made to meet specific load, environmental, and geometric requirements of your assembly. Whether it’s a bolt with an unusual thread pitch, a screw made from a high-temperature alloy, or a rivet designed for blind installation in a composite panel, these fasteners ensure the integrity of the joint. They typically interface between two or more parts, providing clamping force, alignment, or permanent joining. Understanding your custom fastener’s role is the first step to using it correctly.
Before You Start: Setup, Safety, and Site Requirements
Proper preparation prevents installation failures. Before handling any custom fastener, confirm that you have the correct fastener for the application. Check the part number against the bill of materials and inspect the fastener for any shipping damage or manufacturing defects. Verify material compatibility with the mating components to avoid galvanic corrosion, especially if dissimilar metals are involved.
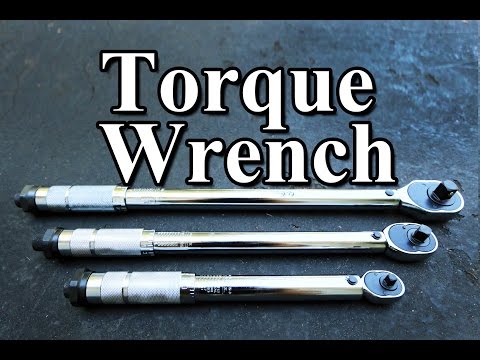
Gather necessary tools: a calibrated torque wrench, appropriate sockets, thread lubricant or locking compound if specified, and any alignment tools. Ensure the work area is clean, well-lit, and free of contaminants that could interfere with thread engagement. For large or heavy fasteners, use proper lifting equipment and wear personal protective equipment (PPE) such as gloves and safety glasses.
Review the design documentation for any special requirements: torque values, tightening sequence, or preload specifications. If the custom fastener was manufactured via processes like cold heading or CNC machining—common in custom fastener manufacturing—be aware that surface finish or thread tolerances might differ from standard fasteners. Confirm that the prototype or first-article inspection matches the design intent.
Step-by-Step Operation: Installing and Maintaining Custom Fasteners
Follow these steps to ensure a reliable joint:
- Inspect and prepare the fastener and parts. Check threads for burrs or debris. Clean mating surfaces thoroughly. If the design calls for it, apply a light coating of anti-seize or thread-locking adhesive. Do not use lubricants unless specified, as they can alter friction coefficients and affect torque-tension relationships.
- Start threading by hand. Align the fastener carefully and engage the threads manually. This prevents cross-threading, which is especially critical in precision-machined custom fasteners. If resistance is felt, stop and inspect rather than forcing it.
- Hand-tighten to set the joint. Turn the fastener until it is snug against the surface. For multiple fasteners, follow any specified pattern (e.g., star or crisscross) to evenly distribute clamping force.
- Apply torque in stages. Using a calibrated torque wrench, tighten to the recommended value in incremental steps. For critical joints, you might first torque to 30% of final value on all fasteners, then 60%, then 100%. This method, common in custom fastener installations, ensures uniform gasket compression and stress distribution.
- Verify installation. After torquing, check that the fastener is properly seated and that there is no gap between components. For tension-critical bolts, consider using a torque-angle monitoring method or ultrasonics to confirm clamp load.
- Maintenance checks. Custom fasteners in service may require periodic inspection. Look for signs of loosening, corrosion, or fatigue cracking. In high-vibration environments, re-torquing may be needed according to maintenance schedules. Always replace fasteners that show permanent elongation or damage rather than reusing them.
Best-Practice Settings for Quality and Yield
Dialing in the correct settings for custom fasteners is what separates a reliable joint from a field failure. The starting point is always the design specification—custom fasteners are often sized and specified with a particular preload range, material grade, and coating in mind. For bolted connections, the preload is achieved through controlled torque application. Where possible, reference the fastener manufacturer’s torque tables or established standards such as ISO 898 for the specific property class and thread size. Our tightening torque reference offers practical guidance for standard conditions.
For critical joints, moving beyond torque control to a torque-angle method or ultrasonic clamp load monitoring can significantly improve yield—meaning fewer rejects or rework episodes. Lubrication of threads and the nut bearing surface is a key variable: a change in friction from dry to lightly oiled threads can alter the achieved preload dramatically. Always apply a consistent lubrication practice, and when anti-seize compounds or threadlockers are used, factor their friction modifiers into the target torque.
Material grade and heat treatment directly influence the fastener’s yield strength. In high-stress applications, ensure the selected property class (e.g., 8.8, 10.9, 12.9) matches the design loads, and never substitute a lower grade. For stainless steel fasteners, slow tightening speeds help prevent galling—a common mode of surface welding that ruins threads. Environment dictates coating choices: zinc flake for corrosion resistance, Xylan for chemical protection, or a simple oil finish for clean indoor settings. Matching the coating to the operating environment prevents early degradation and maintains joint quality over time.
Routine Maintenance Schedule and Common Wear Parts
Custom fasteners in service are not “fit and forget” components. How often you inspect them depends heavily on the operating conditions. In high-vibration machinery or outdoor structures, a visual check every 500 operating hours or quarterly is prudent. Assemblies that experience thermal cycling—such as exhaust manifolds or engine mountings—may require retorquing after the first few thermal cycles to compensate for gasket relaxation and embedding loss.
Common wear parts in a fastened joint go beyond the bolt and nut themselves. Locking elements like nylon inserts (in Nyloc lock nuts) degrade with repeated installation and elevated temperatures, losing their prevailing torque feature. Spring lock washers can lose their spring tension over time, especially when flattened by excessive torque. Flat washers, too, can dish permanently and fail to distribute load evenly. Threads themselves are a wear part: stainless steel threads can gall, causing material transfer, while carbon steel threads can corrode or suffer fatigue cracking in cyclic loading.
A practical maintenance schedule might look like this:
- Initial run-in: Retorque after 24–48 hours of service (or per the manufacturer’s schedule) to recover any embedment relaxation.
- Monthly visual inspection: Look for corrosion, signs of loosening (rust streaks, gaps), or deformation.
- Quarterly torque check: Use a calibrated torque wrench to verify that fasteners remain at the specified torque. An untorquing-then-retorquing method can detect relaxation.
- Annually or at major service intervals: Replace all locking elements, inspect threads for galling or fatigue cracks (dye penetrant or magnetic particle inspection for critical joints), and consider replacing fasteners that have seen high-cycle loads.
Always replace fasteners that show permanent elongation (a visible necking or reduction in diameter), cracks, or severe corrosion pitting rather than attempting to reuse them.
Troubleshooting: 3–5 Common Problems and Likely Causes/Fixes
Even with proper installation, issues can arise. Here are the most frequent problems encountered with custom fasteners and practical steps to resolve them.
- Fastener loosening: Vibration, thermal expansion cycling, or insufficient preload can cause nuts and bolts to back off. Likely cause: Torque below specification or absence of locking feature. Fix: Retorque to the design value. If loosening persists, add a prevailing torque lock nut, threadlocking adhesive, or a serrated washer. In gasketed joints, check for gasket compression set that may have reduced clamp load.
- Thread galling: This is an aggressive form of adhesive wear where threads seize and tear during assembly, most common with stainless steel fasteners. Likely cause: High friction and heat generated by fast tightening without lubrication. Fix: Slow down the installation speed, apply a galling-resistant anti-seize compound or specialized lubricant to threads and the nut bearing face, and ensure thread tolerances are not oversized. For critical applications, consider using dissimilar materials (e.g., a super duplex nut on a 316 bolt).
- Corrosion: Pitting, rust, or white rust on zinc coatings indicates the protective layer is failing. Likely cause: Harsh environment pushing the material beyond its intended use. Fix: Upgrade to a more corrosion-resistant material (e.g., from coated carbon steel to 316 stainless) or apply a more durable coating system such as hot-dip galvanizing or a zinc flake coating. For existing installations, if corrosion is superficial, clean and apply a protective spray, but replace fasteners that have lost structural integrity.
- Stripped or damaged threads: The fastener spins without achieving clamp load. Likely cause: Over-torquing, cross-threading during assembly, or fatigue in weakened threads. Fix: For internal threads, use a thread chaser to clean up the profile; if severely damaged, install a helical insert (such as a Heli-Coil) to restore the thread. For the fastener itself, discard and replace with new. Always start threads by hand to avoid misalignment.
- Fatigue fracture: A bolt or screw breaks under cyclic loading, often near the head-to-shank transition. Likely cause: Improper preload leading to stress fluctuations, or a design flaw where the fastener is the weakest link. Fix: Review the joint design; ensure the correct preload is achieved (torque-angle or ultrasonic verification). Consider a fastener with a higher fatigue resistance, such as a rolled thread after heat treat, or switch to a larger diameter to reduce stress amplitude. Replace all suspect fasteners, as one fracture can overload the remaining ones.
| Aspect | Key Actions and Considerations |
|---|---|
| Installation | Clean and inspect threads; start by hand to avoid cross-threading; apply torque in incremental stages (e.g., 30%, 60%, 100% of final value) for uniform load distribution. |
| Torque Application | Use a calibrated torque wrench; refer to torque tables or standards (e.g., ISO 898); verify preload via torque-angle or ultrasonic methods for critical joints; maintain consistent lubrication between similar fasteners. |
| Inspection | Check for loosening, corrosion, fatigue cracking, or permanent elongation; re-torque as needed, especially after initial run-in; monitor high-vibration joints and thermal cycling assemblies. |
| Maintenance | Replace degraded locking elements (nylon inserts, spring washers) at service intervals; use anti-seize on stainless steel threads to prevent galling; discard and replace fasteners showing deformation or severe corrosion. |
| Troubleshooting | Loosening: retorque, add locking feature. Galling: slow speed, lubricate. Corrosion: upgrade material/coating. Stripped threads: chase or insert repair, replace fastener. Fatigue fracture: verify preload, redesign if needed. |
Frequently Asked Questions
How do I determine the correct torque for custom fasteners?
The correct torque is determined by the fastener's size, material property class, thread pitch, and the desired preload. You can refer to general standard tables such as those based on ISO 898, or use the fastener manufacturer's specific torque recommendations. For critical joints, a torque-angle method or ultrasonic measurement can directly verify the achieved clamp load, bypassing friction uncertainties.
What is the best locking method for high-vibration environments?
In high-vibration environments, prevailing torque lock nuts (such as Nyloc or all-metal types) are effective because they add friction to resist loosening. Spring lock washers, serrated washers, and threadlocking adhesives can also be used. The choice depends on temperature and accessibility; for example, nylon inserts may not be suitable for high heat, whereas all-metal lock nuts or chemical threadlockers are more robust.
How often should I inspect custom fasteners for loosening?
Inspection frequency depends on the operating environment. For high-vibration or outdoor equipment, visual checks every 500 operating hours or quarterly are common. Assemblies that see thermal cycling should be retorqued after the first few cycles. A monthly visual inspection and a quarterly torque check with a calibrated wrench help catch loosening before it leads to joint failure.
What causes thread galling in stainless steel fasteners and how can I prevent it?
Thread galling is caused by high friction and heat generating localized welding between the mating threads of stainless steel fasteners during tightening. It can be prevented by using an anti-seize compound or specialized lubricant, slowing down the assembly speed, and ensuring proper thread tolerance. Using dissimilar materials or rolled threads with a smooth finish further reduces galling risk.
Can I reuse custom fasteners after disassembly?
Reusing custom fasteners is only safe if they show no signs of permanent elongation, cracking, thread damage, or corrosion pitting. Locking elements like nylon inserts or deformed threads degrade with each use and should be replaced. For critical or high-stress applications, it is generally recommended to install new fasteners to avoid undetected fatigue or loss of clamp load capability.